Work In Progress
YOU MUST READ THIS PAGE IF YOU WANT TO PHOTOGRAPH INFOBOX VEHICLE IMAGES FOR THIS WIKIA
As well as informing people about vehicles, locations and other things, we also like to represent these things visually. Please follow the guide below to make sure you get the photos right!
Photographing the Vehicle
Step by step below for Vehicles.
- Prepare the vehicle. Before you take the photo, the car must be ready. If the time is day, you don't need lights on. However, if it is night, it is preferred that you have your lights on. Your vehicle may be modified, however try to keep colouring realistic. No pink secondaries or glowstick primaries (neon).
- Drive the vehicle to an appropriate location. To take a clean photo of your vehicle, drive it to somewhere with a clean background. The concrete squares at the airport are recommended. Position it at an angle.
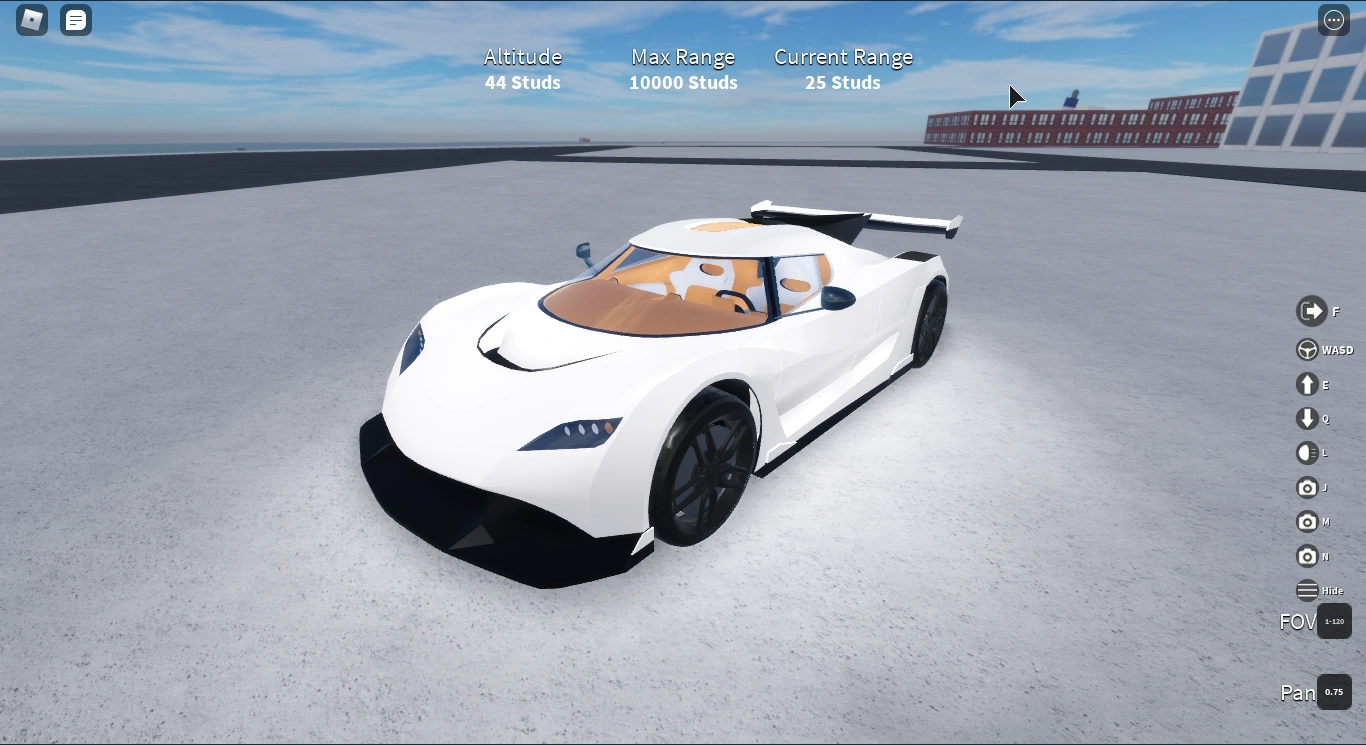
- Spawn a drone. A drone will make it a lot easier to take a good photo. If you do not have one, you can buy one at BestBargainz. The DXL Wraith is the best one and costs $15,000. Fly the drone up and position it so its looking at front-left-quarter of the car. Adjust the camera angle using the arrow keys. Raw example of an uncropped photo:

- Take the photo. Once you have setup your drone like in the photo above, hit PrtScr or PrtSc if you have a Windows computer, or press Command+Shift+3. Make sure your cursor is out of the way.
2. Actually taking the photo. Yes, even the way you take the photo is important for a good infobox image.
2.1. Make sure the time of day is just right. The lighting of the image is important, and we want to make sure that the light level is as high as possible during photography. Take a picture of your vehicle either during the day, noon, or afternoon. Make sure it is not during dusk, evening, nighttime, or dawn, or shadows and colors might make the image less aesthetically pleasing.
2.1.1 Lighting location. When taking a photo, make sure that the source of light (the sun) is not in the camera, make sure it is behind the camera's point of view. This prevents lens flare in the photo, as well as a silhouette effect. If that does not make sense, a diagram has been provided down below.
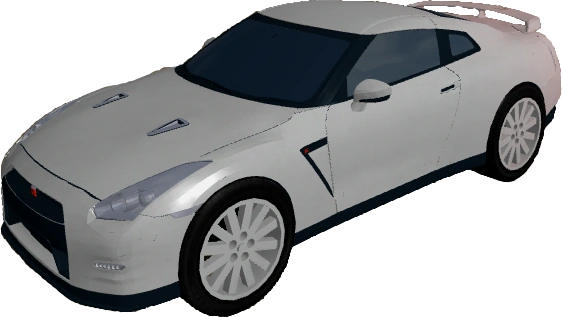
2.2. Get the right angle. We want to keep the angle of the vehicles on the images consistent as well. To do that, the chosen for vehicle images on this wiki is a front 3/4 view on the left side, with some exposed top as well. A few good examples of this perspective have been displayed below
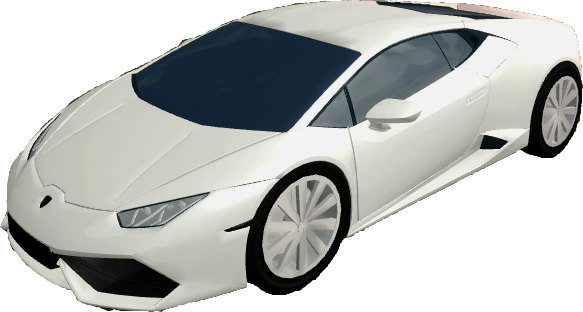
|
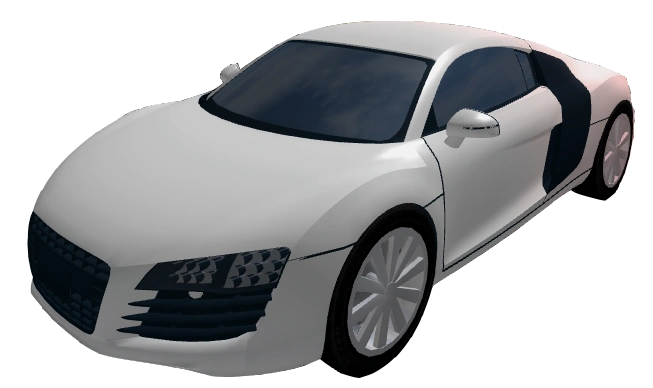
|
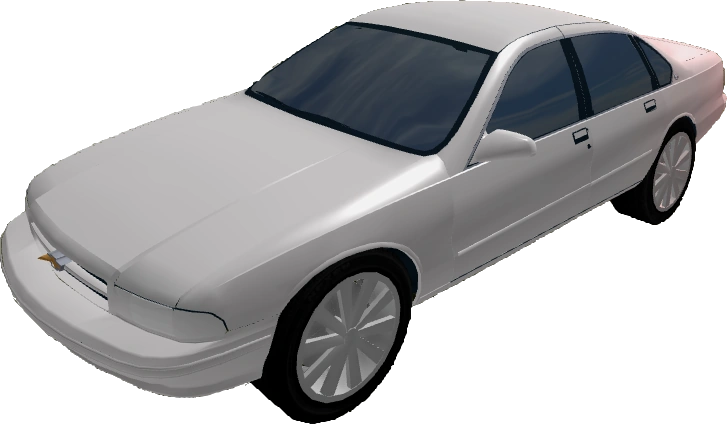
|
|
2.2.1 Optional: The perfect location. Try taking the photo in a clearing, with no buildings around. This will allow the sunlight to hit the car from as many directions as possible, therefore improving the lighting slightly.
2.2.2 Optional (recommended): Take the photo on grass. Or you can just take it on any bright-colored surface in general, as this will help in photo editing later.
2.3. Know your buttons. For this image, we will have to take a screenshot. There are several ways you can take
Windows OSRoblox has a default screenshot button, which is PrtScr. This takes a screenshot of your current game, excluding the HUD (scoreboard, inventory, mouse pointer, etc.). |
OS XIt is harder to screenshot vehicles on a Mac, as most Mac keyboards don't include PrtScr. This means you can't perform Roblox screenshots, at least not with a Mac keyboard. Their default screenshot shortcut is ⌘ (Command) + Shift + 3. However, there are other alternatives. |
2.3.1 Mac Alternative 1: Use an external keyboard. Plug in a keyboard which has the PrtScr button, and use that button when performing Roblox screenshots.
2.3.2 Mac Alternative 2: Use a keyboard remapper. Download a keyboard remapper for your Mac, such as Karabiner (recommended). You can change a useless key on your keyboard to make it function as PrtScr.
2.3.3 Mac Alternative 3: Use a drone. You can fly the drone to the correct perspective, take a normal screenshot, and then trim the edges a bit with a photo editor, which we will get to soon.
As Macs do not come with a Roblox screenshot function, users must make sure that when taking a Mac screenshot, you must close the scoreboard, move your mouse pointer, or other actions which will block the view of the car.
Great! Now that you have an actual image, it's time to edit it and trim the edges!
Editing the Image
Of course, you can't just upload the original screenshot file! We need to trim it to only the car's outline.
- Getting a photo editor. It is highly recommended to use Photoshop, as it has a variety of tools and is arguably the most advanced photograph editor. However, it is not free, which limits the amount of people who are able to use it. In order to keep this page from being too long, we will only write a tutorial for editing the photo in Photoshop CC 2017. If you are not able to acquire a copy of it, you can find another free editor which has the same tools.
- Editing! To start off, you want to open up your original screenshot of a vehicle in Photoshop, or create a new file and paste your Windows screenshot in.